REVIEW · KANDY
Interactive Batik Workshop and Lessons in Sri Lanka
Book on Viator →Operated by Soul Sri Lanka · Bookable on Viator
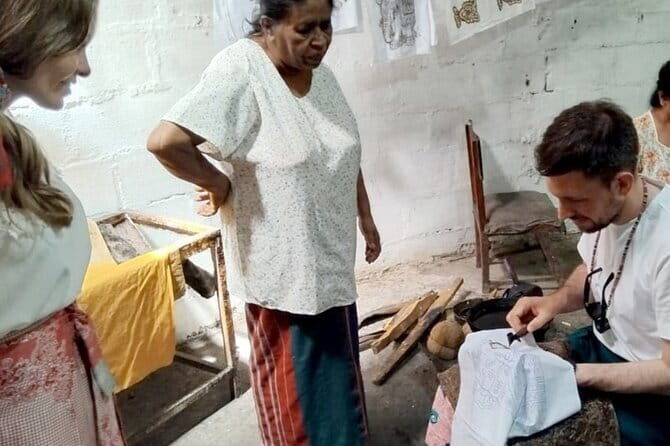
One hour of wax can teach you patience. This interactive batik workshop in Kandy is hands-on from fabric choice to the final de-waxing, and you’ll leave with your own cloth. I love the small group size (max 10) and the chance to ask questions while the instructor guides every step.
The best part is the traditional home-studio setting, where you see how the craft really works day to day. You’ll use classic tools like tjanting and stamps, work through wax resist techniques, then dye with different systems. The only thing to consider: there’s no lunch and transportation isn’t included, so plan your morning and get yourself to Thalapiyannawa Road.
In This Review
- Key Highlights You’ll Feel Immediately
- Getting to Thalapiyannawa Road and Starting at 8:00
- A Small Group Where You Can Actually Ask Questions
- Your Own Batik Cloth: Picking Fabric and Planning the Design
- Traditional Tools You’ll Use: Tjanting, Funnel Work, Stamps, and More
- Wax Mixtures, Waxing Techniques, and the Wax Resist Moment
- Dyes and Applications: Naphthol, Vat, and Reactive Techniques
- Wax Burning and Wax Boiling: The De-Waxing Finish
- Tea, Snacks, and a Home-Studio Morning Rhythm
- Price and Value: What $28 Buys You in Real Terms
- Who Should Book This Batik Workshop in Kandy
- Quick Practical Tips Before You Go
- Should You Book This Interactive Batik Workshop?
- FAQ
- How long is the batik workshop?
- Where is the meeting point, and does it end there too?
- What does the $28 price include?
- Is lunch included?
- What’s the group size limit?
- What is the cancellation policy?
Key Highlights You’ll Feel Immediately
- A true hands-on batik workflow from fabric selection through waxwork and dyeing
- Traditional tools up close including funnel/tjanting and Henry tool methods
- Dye variety on the schedule: naphthol, vat, and reactive dye techniques
- Small group attention so you’re not left guessing at the tricky steps
- A home-studio welcome with herbal tea and often refreshments/snacks
- You take your cloth home as a finished souvenir
Getting to Thalapiyannawa Road and Starting at 8:00

This workshop starts at 8:00 am from Thalapiyannawa Road in Kandy, and it ends back at the same meeting point. The day is designed around a focused block of time—about 3 hours 30 minutes—so you’ll want to treat it like your main morning plan.
Price is $28 per person, and it’s set up as a small-group activity with a maximum of 10 people. It also uses a mobile ticket, which is handy if you like everything in one place.
One practical note: private transportation isn’t included. That means you should arrange your own way there (taxi, tuk-tuk, or whatever fits your schedule) and factor in some buffer time so you arrive calm, not rushed.
More Batik & Craft Workshops in Kandy & Sri Lanka's Hill Country
A Small Group Where You Can Actually Ask Questions
What makes this worth your morning is the pace and the attention. With a cap of 10 participants, the instructor can slow down when you’re unsure and step in when a line or dye application needs correction.
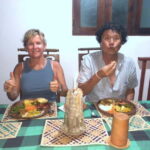
From what I can tell, the hosting style is very family-based—welcoming you into their home workspace and keeping the mood comfortable. In past sessions, names like Anuja and Manugi show up alongside family members, and that family-team approach matters: you’re not watching from the sidelines.
You should come in with the expectation that batik is work. Wax, dyes, and tools all take careful handling, and the process rewards focus more than speed.
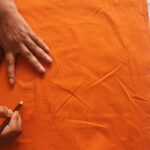
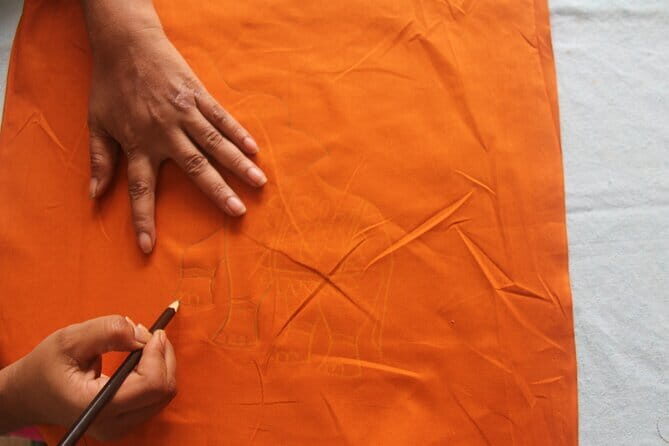
Your Own Batik Cloth: Picking Fabric and Planning the Design
You’ll begin with the end in mind: your cloth. The workshop covers the full arc—choosing fabric, selecting or preparing a design, then completing the waxwork—so you understand what each stage is doing to the final pattern.
Fabric selecting isn’t just a formality. In batik, the fabric choice affects how dyes sit and how the wax resist holds. You’ll also get guidance on wax designing, which is where your drawing decisions start becoming real.
In plain terms, you’re learning the logic of the craft:
- Wax blocks dye where you don’t want color
- Later steps build layers and contrast
- The final look comes from planning, then patience
You also get to take your piece home as a souvenir. That’s the big difference between a demo and a real lesson—you’re building something, not just watching it happen.
Traditional Tools You’ll Use: Tjanting, Funnel Work, Stamps, and More
The workshop isn’t vague about tools. You’ll be introduced to the core instruments used in wax batik practice, including:
- Funnel / tjanting tools (the classic wax reservoir and nozzle style)
- Henry tool (another traditional tool method you’ll learn to use)
- Stamping
- Wax spraying
- Brush arts
- Cracking techniques
If any of those sound intimidating, good—this is where the instruction earns its value. With a small group, you can ask how to hold the tool, what thickness to aim for, and how to correct a mistake before dye time.
The tools matter because they create different lines and textures. A stamped area looks different from a hand-drawn one, and sprayed wax behaves differently than poured or traced wax. By using several techniques, you start to see the style of batik as a toolbox, not one single method.
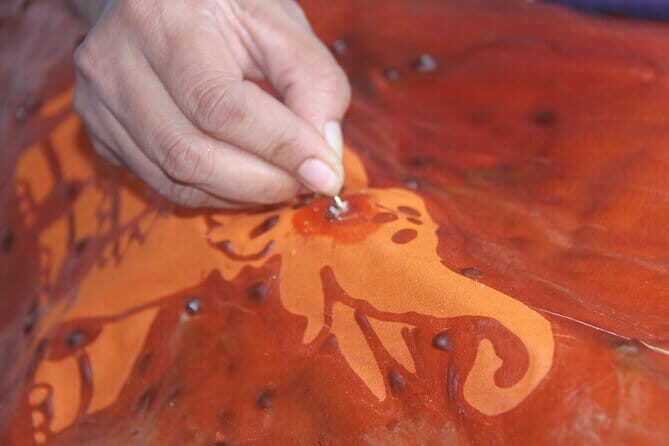
Wax Mixtures, Waxing Techniques, and the Wax Resist Moment
Once your design is decided, you move into waxing. The workshop includes wax mixtures and waxing techniques, plus practical coverage of wax spraying and other resist applications.
This is the “do not rush” part. Wax has to be consistent, and your hand needs steady control. If you’ve never worked with wax resist before, you’ll quickly learn how small changes in application can shift the final look.
You’ll also cover cracking and brush arts—two elements that can create texture and character. Cracking is especially interesting because it turns the wax layer itself into part of the pattern. Instead of only relying on line work, you’re shaping the surface and how it later interacts with dyes.
Wax designing is both artistic and technical. You’re learning how to place wax strategically so the dye lands the way you want—then how to keep your design crisp through the next steps.
A few more Kandy tours and experiences worth a look

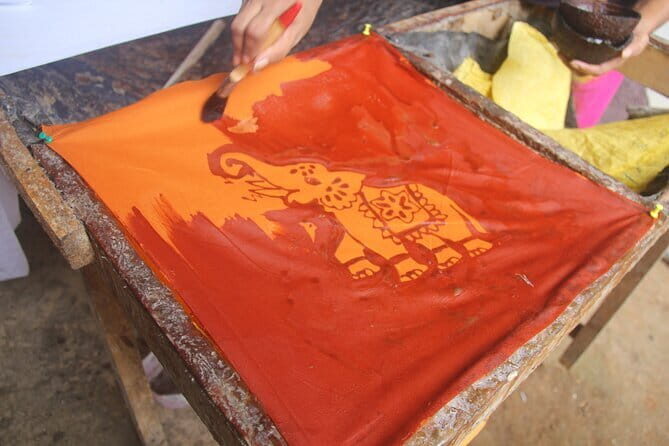
Dyes and Applications: Naphthol, Vat, and Reactive Techniques

Here’s where this workshop goes beyond basic batik. You’ll cover dye mixtures and techniques, specifically:
- Naphthol dyes
- Vat dyes
- Reactive dyes
Even if you don’t plan to do chemistry at home, this is useful knowledge. Different dye systems behave differently, and that changes how you plan timing and applications. Learning that batik isn’t one uniform dye process helps you understand why some patterns look sharp and others look softer or deeper.
You’ll get hands-on experience with dye application and the idea of building color step by step. Think of it like layers of decisions: what you waxed controls where color can go, and what dye system you used controls how color develops.
Also, pay attention to how the workshop explains dye mixtures and techniques. The fact that the class mentions multiple dye types tells me they’re aiming for a real understanding, not a single shortcut.
Wax Burning and Wax Boiling: The De-Waxing Finish
After dye comes the satisfying part—getting the colors back out by removing the wax. The workshop includes de-waxing methods: wax burning and wax boiling.
This stage is crucial because it’s where your wax resist pattern becomes visible as a whole. If you applied wax carefully, the reveal should look clean and intentional. If your wax application was uneven, you’ll still learn something—because you’ll be able to see exactly where the resist failed.
The de-waxing step also makes the whole process feel complete. It’s one thing to color fabric; it’s another to remove the barrier and watch the final contrast appear.
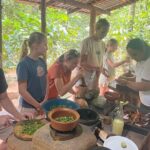
Tea, Snacks, and a Home-Studio Morning Rhythm

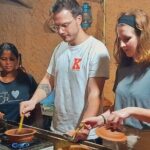
Expect a welcoming setup. The workshop includes a refreshing herbal tea, and on at least some mornings, refreshments and snacks are part of the hosting. There’s often a cozy, traditional home studio environment, with experienced instructors and their equipment ready for work.
This kind of setting is more than comfort. It keeps the learning loop tight. If you’re stuck, you can ask right then. If your wax line needs help, the instructor can adjust instruction before you reach the next dye stage.
The pace is also part of the value. You’re not dealing with a rushed factory-style demonstration. You’re doing craft steps that take time, and you get guided repetition.
No lunch is included, so plan to have your food either before you go or after the workshop ends back at Thalapiyannawa Road. Since you start early at 8:00 am, having a snack plan matters.
Price and Value: What $28 Buys You in Real Terms
Let’s talk value honestly. At $28, you’re paying for:
- All tools and equipment needed
- Cloth and other materials for the program
- All fees and taxes
- A guided, step-by-step process that ends with you taking your piece home
That’s a lot of included value for a half-day craft activity. You aren’t just getting a quick look at wax batik—you’re learning tools, techniques, and multiple dye systems, then completing the process through de-waxing.
The price also makes sense because the group is small (max 10). In a bigger class, you might get less hands-on help. Here, you should expect more direct attention when something goes wrong (and in a craft workshop, something always goes wrong at least once).
Your main cost outside the base price is logistics: transportation to the meeting point and meals. If you handle those smartly, $28 starts looking very fair for what you actually do.
Who Should Book This Batik Workshop in Kandy
This works best if you want hands-on learning and you enjoy making things with your own hands. If you’re the type who likes understanding how the steps connect—wax resist to dye to final reveal—this is your kind of class.
It’s also a solid choice for people who like conversation and questions. The small group format helps, and the instructors guide each participant where help is needed.
Most people can participate, which suggests the workshop isn’t limited to experienced artists. Still, come ready for slow, careful work rather than a quick souvenir stop.
If you’re short on time, you’ll need to protect this 3.5-hour block. If you already have a packed Kandy day, treat this as the anchor event.
Quick Practical Tips Before You Go
A few practical notes make the experience smoother:
- Wear clothes you’re okay with potentially getting stained or speckled. Wax and dyes are part of the process.
- Plan to start the morning well-fed. Lunch isn’t included, and you’ll be working steadily.
- Keep your schedule flexible enough to get to Thalapiyannawa Road on time for the 8:00 am start.
- Bring a curious mindset. The value is in learning why each step matters, not just copying a pattern.
If you’re thinking of making gifts or keeping something long-term, handle your finished cloth carefully when you leave, since batik pieces can be sensitive after dyeing and de-waxing.
Should You Book This Interactive Batik Workshop?
I think you should book it if you want an authentic craft session where you actually make the product, not just watch the process. The combination of small-group guidance, multiple dye systems (naphthol, vat, reactive), and learning tool use like tjanting and stamps makes the $28 price feel earned.
Skip it if you’re looking for a casual, low-effort activity or if you don’t want to spend a focused morning working with wax and dyes. Also, factor in the missing lunch and transportation so you don’t turn a pleasant workshop into a stressful logistics puzzle.
FAQ
How long is the batik workshop?
It runs for about 3 hours 30 minutes.
Where is the meeting point, and does it end there too?
The activity starts on Thalapiyannawa Road in Kandy and ends back at the same meeting point.
What does the $28 price include?
The price includes all tools and equipment, the cloth and other materials needed for the program, and all fees and taxes.
Is lunch included?
No, lunch isn’t included.
What’s the group size limit?
The workshop has a maximum of 10 travelers.
What is the cancellation policy?
You can cancel for a full refund up to 24 hours before the experience’s start time, based on local time. If you cancel later than that, the amount paid won’t be refunded. Free cancellation is available.